To add your htmlsig signature to Apple Mail on a Mac, copy it from your signature page in Chrome or Firefox, then go to Mail > Settings > Signatures, create a new signature and paste it in.
Step 1: Copy your signature
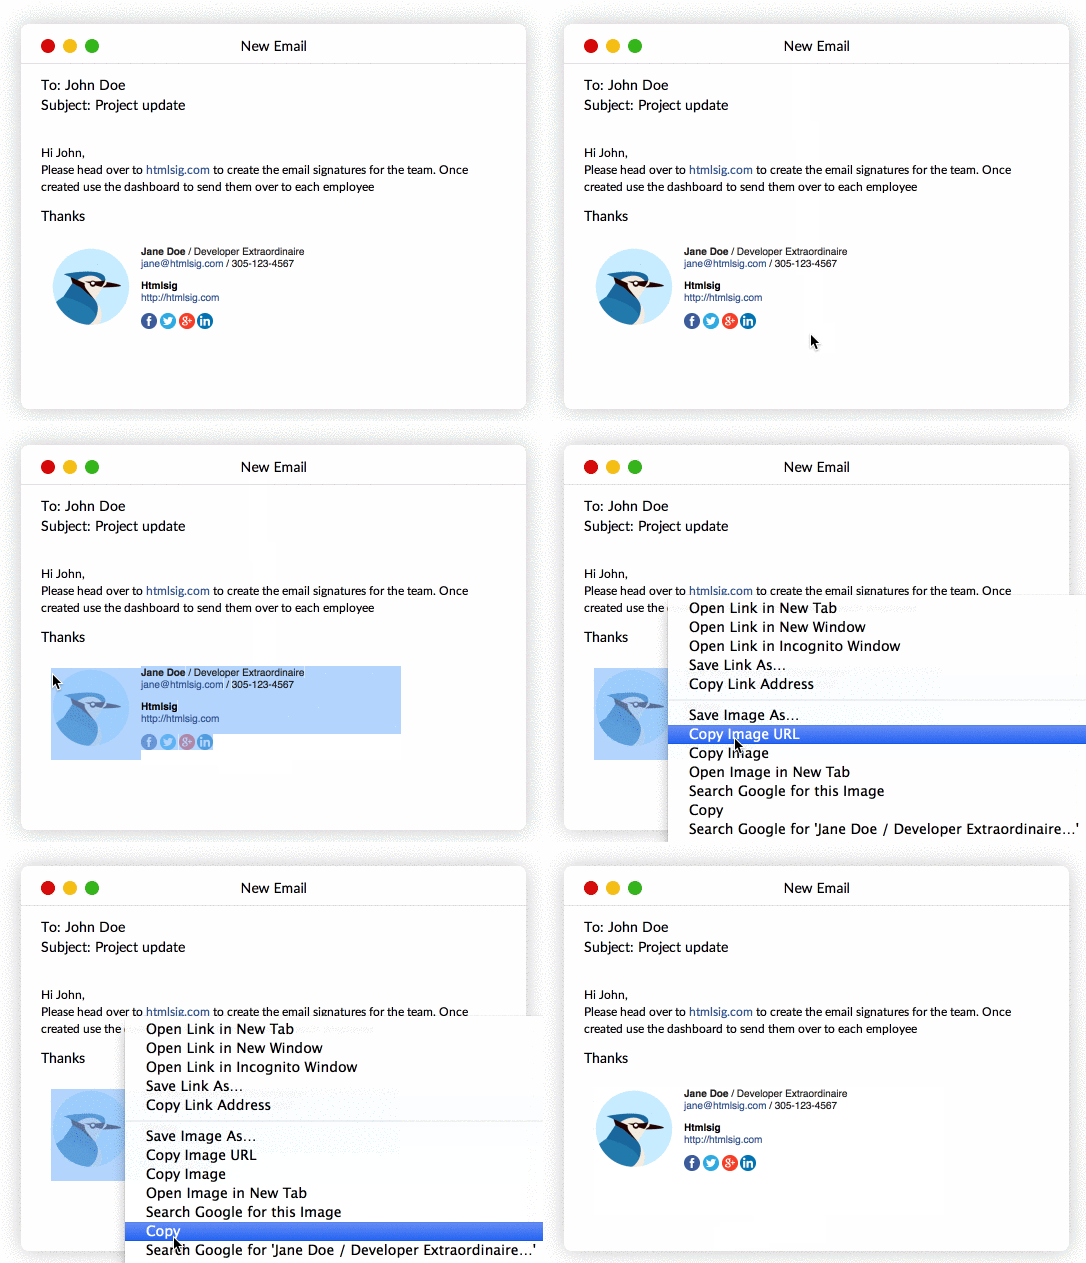
- Open your signature in htmlsig using Chrome or Firefox. Avoid Safari for this step, as copying from Safari can cause layout problems.
- Click Open in New Tab. Your signature opens on its own in a new window.
- Select the whole signature (Cmd+A) and copy it (Cmd+C).
Step 2: Add it to Apple Mail
- Open Apple Mail and go to Mail > Settings (called Preferences on macOS Monterey and earlier), then click the Signatures tab.
- Select the email account you want to use in the left column, then click + to create a new signature and give it a name.
- Uncheck Always match my default message font, so your signature keeps its own fonts and formatting.
- Click into the signature box on the right and paste your signature (Cmd+V).
- Choose your new signature in the Choose Signature menu at the bottom, then close the settings window.
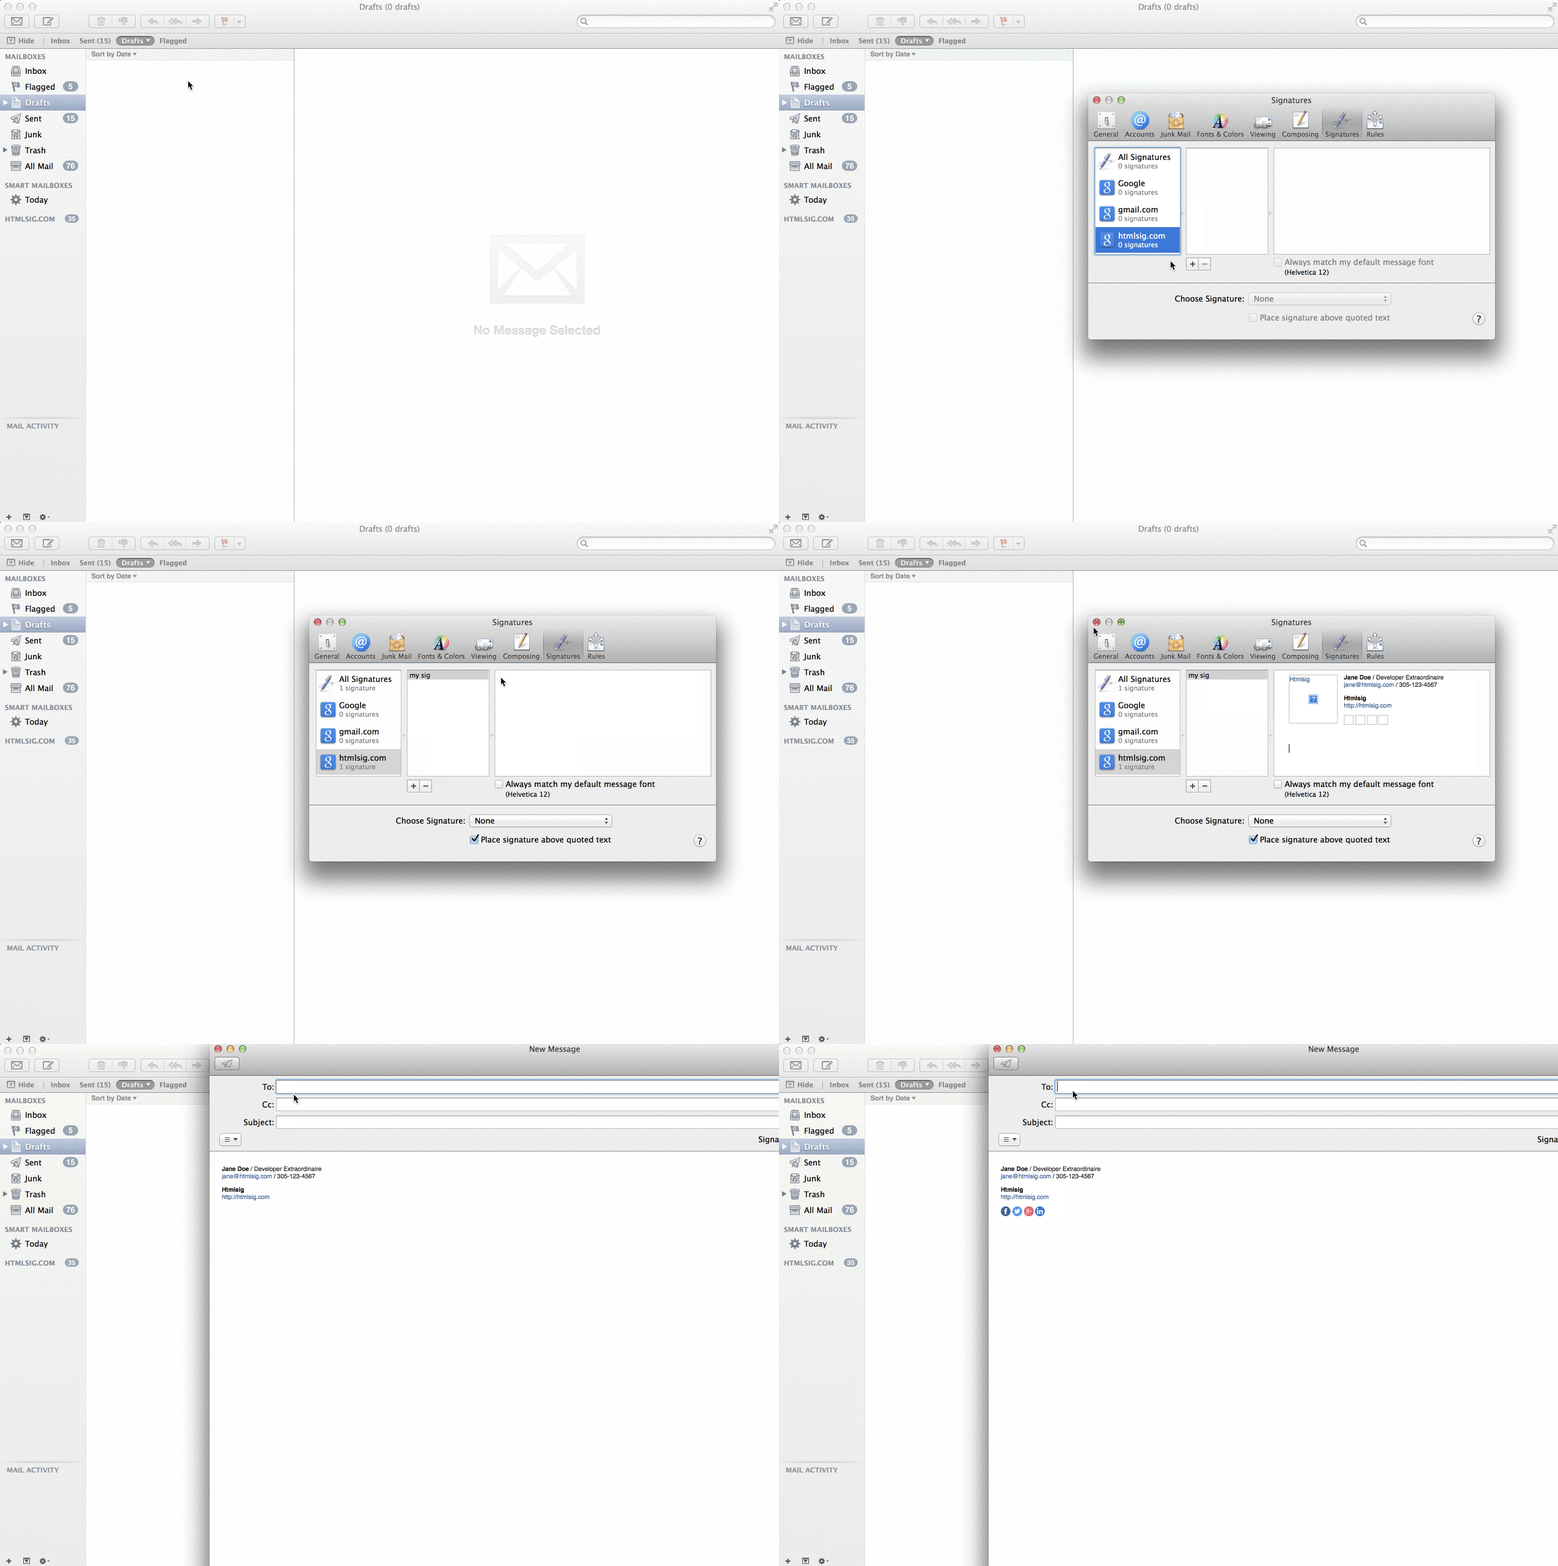
After pasting, your images may show as empty boxes in the settings window. This is normal. Close the settings window and start a new email, and the images should display correctly. If they still don't, see images not showing in Apple Mail.
Check that it works
Create a new email and check that your signature appears. If it doesn't show up automatically, pick it from the Signature menu in the new message window. If the layout looks off, see why your signature looks bad in Apple Mail.