To add a banner, open the Banner tab in the signature editor, set Show Banner to Yes and upload your image under Banner Image. The recommended size is 450 × 200 pixels, or 900 × 400 pixels for a sharper retina banner.
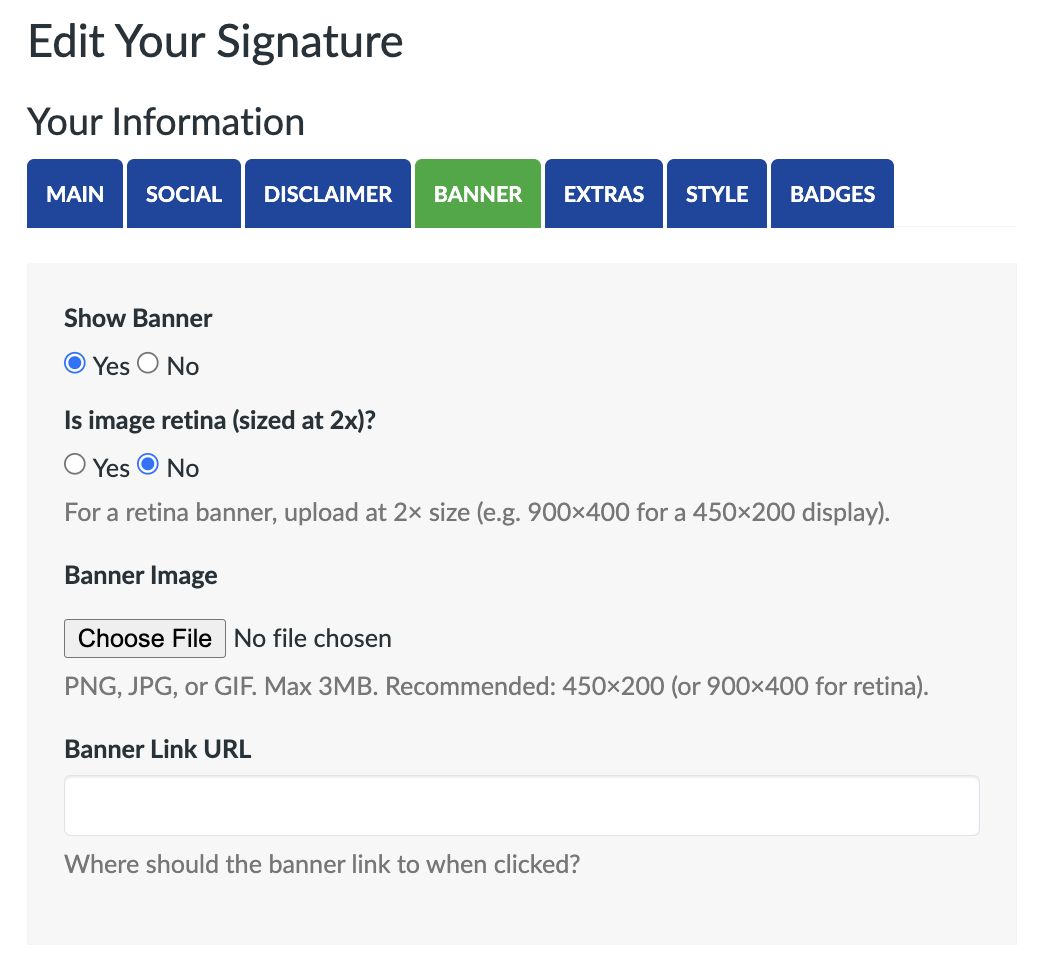
How to add a banner
- Open the signature editor and click the Banner tab.
- Set Show Banner to Yes.
- Under Banner Image, click Choose File and select your image. It uploads straight away and appears in the preview.
- In Banner Link URL, enter the page you want people to land on when they click the banner.
- Click Create Signature (or Update Signature) to save.
What size should my banner be?
- Standard: 450 × 200 pixels.
- Retina (sharper on high-resolution screens): 900 × 400 pixels, with Is image retina (sized at 2x)? set to Yes.
- Formats: PNG, JPG or GIF, up to 3MB.
Other sizes work too. A standard banner wider than 450 pixels is scaled down to 450 pixels wide. Images larger than 900 × 400 are shrunk to fit within 900 × 400 when you upload them.
How to make your banner sharp on retina screens
Make your image at twice the size you want it to appear (for example 900 × 400 for a 450 × 200 banner) and set Is image retina (sized at 2x)? to Yes. htmlsig then displays it at half its pixel size, so it looks crisp on high-resolution displays.
Only choose Yes if your image really is double size. Otherwise your banner will show up at half the size you expect.
What does the Banner Link URL do?
It's where people go when they click your banner. Clicks are tracked, so you can see how your banner is doing on your signature's stats page. See How to see who clicked your signature links.
How to remove a banner
Set Show Banner to No and save. This also clears the banner image and link from that signature, so you'll need to upload the image again if you turn it back on later. To swap the image without turning the banner off, click Remove Banner and choose a new file.
Banner not appearing in your email? See Why isn't my banner showing?.